
When working with Jenkins Shared Libraries, a problem you’ll run into, sooner or later, is that you’ll want to simultaneously make a change in two places:
- the library code
- the code in your
Jenkinsfilethat uses the modified library code
The problem is that the modified library code lives in a branch in the library repo, whereas the code you need to add to the Jenkinsfile to test it will live in a branch inside your project repo (or whatever repo your Jenkinsfile lives in, but — whatever the case — a different repo to the library one).
For clarity below, we’ll call the first repo “library repo” and the second one “pipeline repo”. Each of these needs to have its own (short-lived) branch that will allow you to test your change.
The easy approach
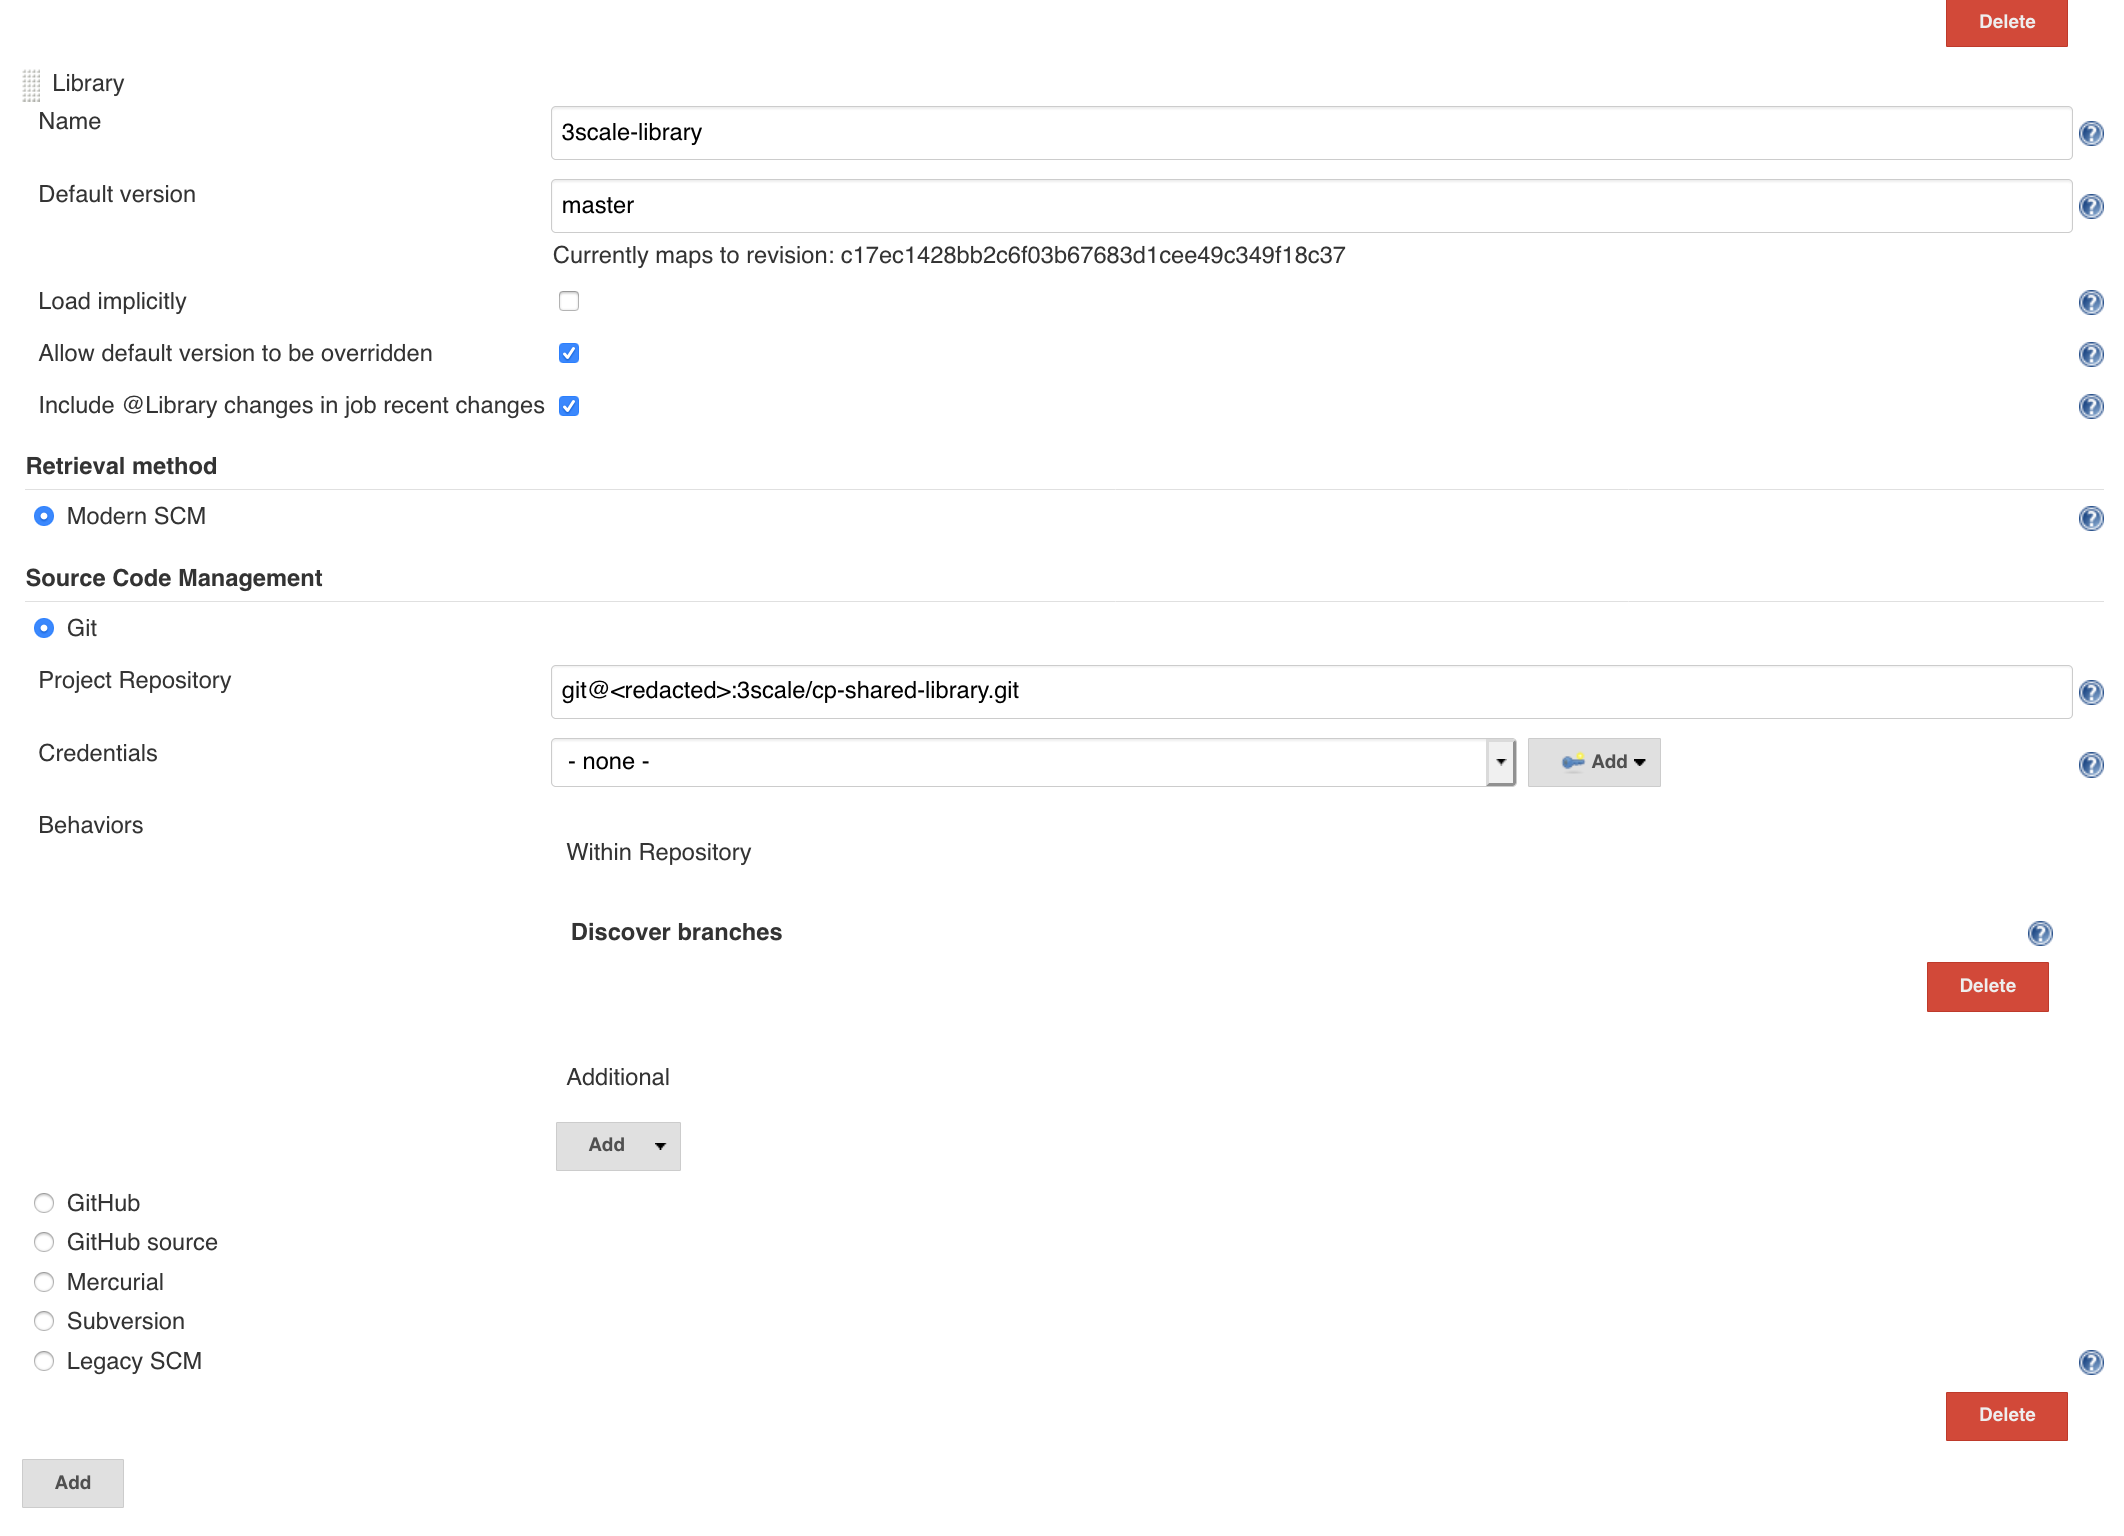
A very easy way to test the new code is to push a new branch to your library repo and then head on over to Jenkins System settings and change the default version of the shared library that Jenkins loads from the library repo, to the version in that development branch.
This way Jenkins will pick up the changes from the library repo branch and use the new library feature in the next run of your job. You then just need a branch in your pipeline repo, where you store the code changes for actually using the new code from the library. And then to run a job against this pipeline repo branch.
Of course, this simple / easy way to test things out is far from perfect. It requires a manual step of changing your Jenkins System settings and changing the default library version might a̵f̵f̵e̵c̵t break! any other job that relies on it. Maybe a suitable approach for a dev env where you’re just on your own Jenkins, but probably no-go area for a shared Jenkins instance with frequent jobs from other teams.
The isolation approach
Ideally, you’d want these changes to be isolated from any other job, so your slack notifications don’t start sounding like a ringtone after your teammates’s jobs start randomly failing…
One way to do this is to change the library version your job uses, but from your
Jenkinsfile rather than from the Jenkins System settings. You can do by explicitly
loading the library version
you need.
The code, assuming you want to load the version from branch feature/branch, of your library
repo, would look like this:
library "3scale-library@feature/branch"
This would allow you to keep your build entirely isolated from others, and test the changes from the library in your code.
The downside with this approach is that the branch name of the library repo then becomes hard-coded. And what’s more, you don’t want to keep it that way. You only want to use the version from your feature branch, just while you’re still developing that feature. Once your Pull/Merge request was merged in your library repo, you would want the pipeline repo to use the standard version of the library again (e.g. master).
Can we do any better?
Yes, clearly! (Otherwise what would this post be about, right?)
We will base our approach on the above method for loading the library, and use a simple convention:
If a branch exists in library repo, and it has the same name as the branch in the pipeline repo, we will use that version of the library, instead of the standard one.
Basically, in our Jenkinsfile we will try to load the library from library repo branch
with the same name as the branch from pipeline repo, that the pipeline is running on.
This branch name is made available as an environment variable in the pipeline DSL, so we never need to commit any branch names in our source!
  stage('Load 3scale Library'){
    steps {
      script {
        try {
          library identifier: "3scale-library_branch@${env.BRANCH_NAME}",
              retriever: modernSCM(
                  [
                      $class: 'GitSCMSource',
                      remote: 'git@<redacted>:3scale/cp-shared-library.git',
                      credentialsId: '<redacted>'
                  ]
              )
        }catch(Exception e) {
          echo "tried to load library version from ${env.BRANCH_NAME}, but branch does not appear to exist in library repo. Continuing with default version."
          library identifier: '3scale-library_default@master',
              retriever: modernSCM(
                  [
                      $class: 'GitSCMSource',
                      remote: 'git@<redacted>:3scale/cp-shared-library.git',
                      credentialsId: '<redacted>'
                  ]
              )
        }
      }
    }
  }
This is neat & tidy!
Because:
- we never need to make any manual changes to Jenkins to start using new code from shared library — just push a new branch, as you normally would
- we never need to merge untested code to master branch, just so we can test it
- we never need to commit any branch names to source control (and therefore never need to revert any commits)
- with the library scm definition entirely a part of the Jenkinsfile, Jenkins system settings don’t have to be modified at all!
Limitations
You might notice one limitation in the code above:
the library step does not allow the same library name to be loaded twice
(even though the first load failed… : / ).
As such, we have to resort to the only not-so-elegant bit in our solution: use a different name for the library.
IMPORTANT: For this to work, you MUST NOT have a library with either of the above two
names defined in the global settings with the “Load implicitly” option enabled, because,
as per the documentation,
the library step cannot be used to override an implicitly loaded library version.
Hope this helps someone out there — took me a few hours to get this setup tested, so I thought I’d save others the trouble…
Please leave a comment if you think this can be improved further!